Setting Up a PHP Cloud Hosting Server for the first time!
In this article, we are going to learn how to go about Setting Up a PHP Cloud Hosting Server for the first time! This article is intended for the beginner, or someone who is still learning and looking to gleam some new tips.
Choosing Your Host
Cloud hosting providers are plentiful these days, with options from Amazon, Google, Microsoft, even IBM. The “BIG guys” in the tech industry offer great solutions but it usually comes at a great cost.
Fortunately there are several other great Cloud hosting providers that are rock solid and yet much more affordable. I personally use three different providers to host my various cloud applications. First off is Digital Ocean, the provider I will be using in this article. I also use Vultr and Linode. All three of the providers have data centers throughout the country which is very convenient. They are priced very competitively as well!
Creating your first “droplet”
At this point you should have already reviewed the pricing and created an account with one of the providers. If not please do so before continuing.
Again, this is assuming you are using Digital Ocean.
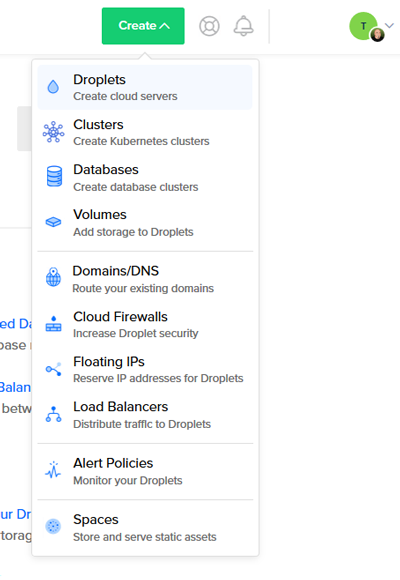
While logged in, choose to create a new Droplet by selecting the Create button on the top right corner, and selecting Droplets.
Wait, what is a droplet you ask?
“Digital Ocean Droplets are Linux-based virtual machines (VMs) that run on top of virtualized hardware. Each Droplet you create is a new server you can use, either standalone or as part of a larger, cloud-based infrastructure.”
Ok, now on to creation!

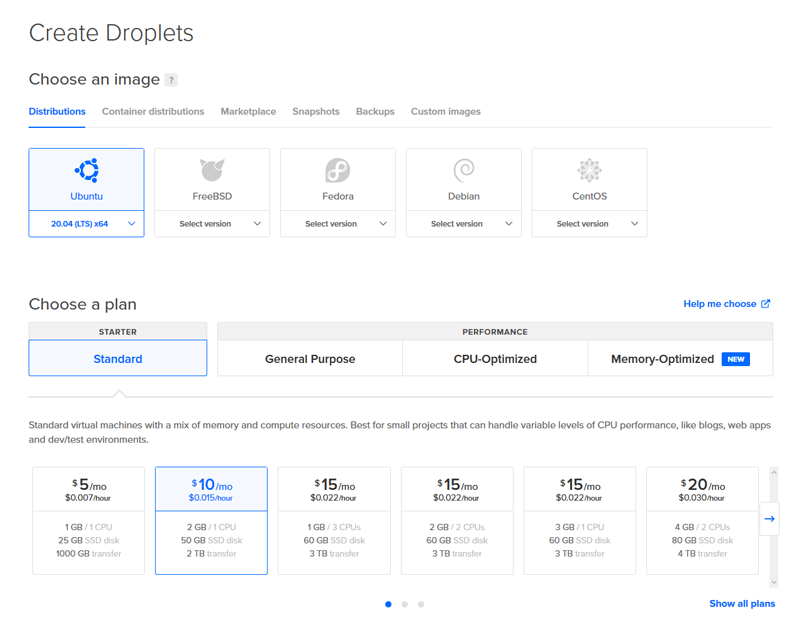
Select the droplet OS:

As you can see above, we have selected Ubuntu 20.04 LTS x64. When the page loads, it will default to 18.04 LTS x64 so select the down arrow to select 20.04 LTS x64.
Select a region:
Now we select the region we wish the droplet to be located in. If the majority of your sales would likely come from the western US for example, you would choose San Francisco. As for when center within the reason, this is only important when you set up multiple droplets that will need to communicate with each other and will involve Private Networking.

Choose your authentication:
At this point we determine how we are going to authenticate root access. There are two types: SSH Keys and Password. If you are already familiar with SSH key authentication then I suggest you choose this method otherwise choose the password method where the password will be sent to you via email.

Set the hostname:
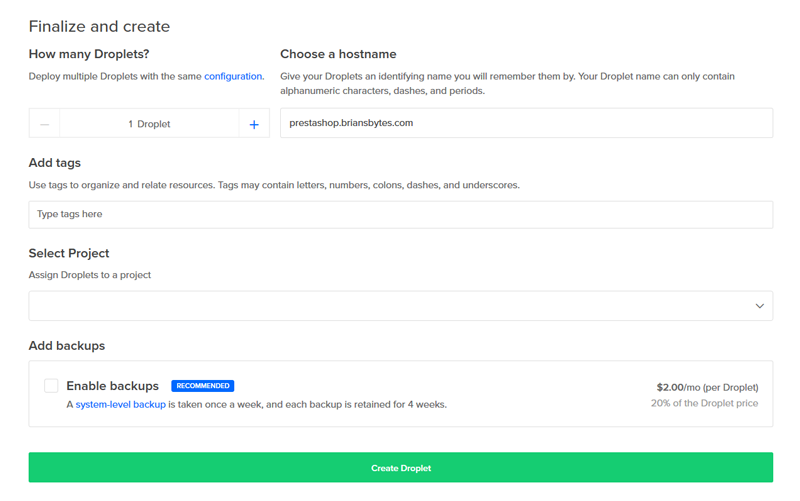
Now here is where you enter the hostname for the droplet. For example, if your domain is briansbytes.com, you could enter www.briansbytes.com or just briansbytes.com. You can also choose to enable backups, which we would HIGHLY recommend! When you are done, review all of the options and select Create Droplet!

It usually takes a few minutes for the droplet to be created, which at that time you will receive and email message with the droplets details.
Setting Up Your New Droplet
Depending on how it will be used will mostly determine what we do from this point. But for PrestaShop in this example, here is what we need!
- Apache Web Server version 2.4+
- PHP 7.3
- MySQL 8
- Postfix
- Webmin
Log into the dashboard and find your access information for the newly created droplet. (or look for the email message, whichever is easiest!) There you will find two things that we need at this point, the IP address of the droplet and the root password.
Whatever you do, NO NOT SHARE THE ROOT PASSWORD with ANYONE, including us! (If out help is needed, we will instruct you as how to give us access to your droplet remotely.)
Now we get connected!
Server setup:
Install Apache using Ubuntu’s package manager, apt:
apt update
apt upgrade -y
apt install build-essential wget curl
apt install apache2
In conclusion!
We hope you have learned how to go about Setting Up a PHP Cloud Hosting Server for the first time! If you have nay questions, leave a comment!
References

